Create a custom frontend
Learn how to create a custom frontend in the Frontdoor console and configure the necessary DNS records at your domain provider.
Creating a custom frontend allows you to serve your NetFoundry Frontdoor shares from your own domain name. This provides a seamless, professional experience by replacing the default URL with a branded link (e.g., files.your-company.com).
In addition to branding, a custom frontend is a prerequisite for securing your shares with an OAuth provider, allowing you to enforce authentication from identity providers like OIDC, GitHub, or Google.
Steps
- Frontdoor console
- Command-line interface
-
From the Frontdoor console, click Frontends in the left-hand menu.
-
Click the + icon to create a new custom frontend.
-
Enter your domain name, then click Next.
-
(Optional) Select an auth provider, then click Save.
You'll get a loading message that your DNS info is being created. You can wait for it to finish, or navigate away and come back later:

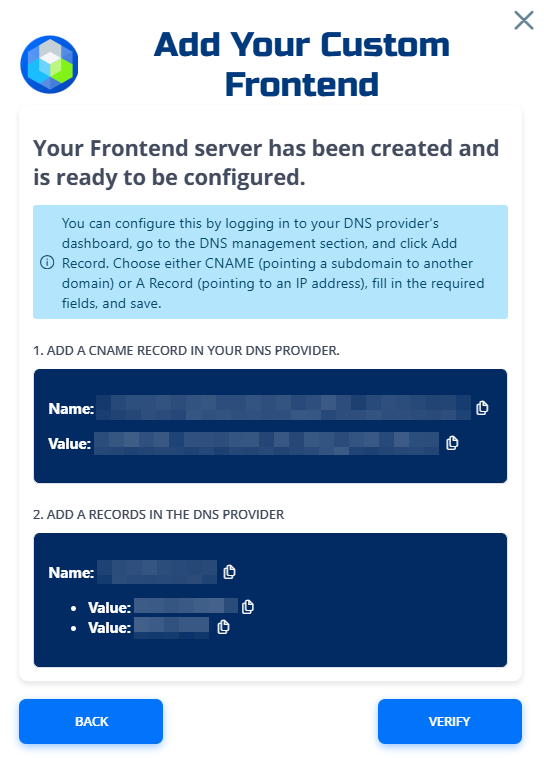
Once the DNS info is ready, the screen will refresh with your CNAME record and A Record info.

-
Create the CNAME and A Records in your DNS provider, as shown in the Frontdoor console, then click Verify.
It may take some time for DNS changes to propagate.
-
(Optional) NetFoundry will verify your DNS records, but you can also verify manually using command-line tools like
nslookupordig.Use the sample responses provided by NetFoundry to confirm your records are set up correctly.
-
Click Next to finish creating your custom frontend, then exit out of the screen.
Your newly created custon frontend will appear in the frontends list with a status of Pending until DNS verification is complete. Once verified, the status will change to Active.
Use the REST API to create a custom frontend for Frontdoor.
-
Replace the placeholders and run:
curl --location "https://gateway.production.netfoundry.io/frontdoor/$FRONTDOOR_ID/custom-frontends" \
  --header "Content-Type: application/json" \
  --header "Authorization: Bearer $TOKEN" \
  --data '{
    "domainName": "'"$DOMAIN_NAME"'",
    "authProviderIds": ["'"$AUTH_PROVIDER_ID"'"]
}'- The
authProviderIdsarray is optional. Only include it if you want to attach an OAuth auth provider to this frontend. - The response will return a JSON object with the
customFrontendIdand statusNEW.
- The
-
After creation, it may take a minute for the frontend status to update to
PENDING. You can check the frontend status:curl -s \
-H "Authorization: Bearer $TOKEN" \
-H "Accept: application/json" \
"https://gateway.production.netfoundry.io/frontdoor/$FRONTDOOR_ID/custom-frontends" -
Once the frontend status is
PENDING, fetch the DNS info:CUSTOM_FRONTEND_ID="your_custom_frontend_id_here"
curl -s \
-H "Authorization: Bearer $TOKEN" \
-H "Accept: application/json" \
"https://gateway.production.netfoundry.io/frontdoor/$FRONTDOOR_ID/custom-frontends/$CUSTOM_FRONTEND_ID/dns-records"The response will include:
{
  "frontdoorId": "your_frontdoor_id",
  "customFrontendId": "custom_frontend_id",
  "domainName": "files.your-company.com",
  "aRecord": {
    "name": "*.files.your-company.com",
    "ipAddress": ["75.2.114.129","166.117.134.68"]
  },
  "cnameRecords": [
    {
      "name": "_randomhash.files.your-company.com.",
      "value": "files.your-company.com.domains.zrok.sandbox.netfoundry.io"
    }
  ]
} -
After updating your DNS, you can verify DNS propagation using
digornslookup:dig +short *.files.your-company.com
dig +short _randomhash.files.your-company.comOnce DNS resolves correctly, the frontend status will change to
ACTIVE.
See the custom frontends API guide for more details.
Next steps
After creating a custom frontend, you can create a custom branded share by selecting it during share creation.